Posted on Leave a comment

How to Import GrutBrushes Photoshop ABR brushes into Procreate

Yes, it’s true that you can import Photoshop ABR brushes into Procreate and most of the GrutBrushes Art Brushes will import and Procreate will convert them.

BUT…I should start by stating that I don’t recommend importing Photoshop ABR brushes into Procreate if you can avoid it. It’s always going to be better to install the native Procreate .brush format brushes whenever you can.

When Procreate imports an ABR it does an incredibly difficult conversion, and it does it amazingly well, but it’s still a conversion and you will find that many of the brushes don’t look exactly the same as they do in Photoshop and you will find an occasional brush that just don’t work at all.

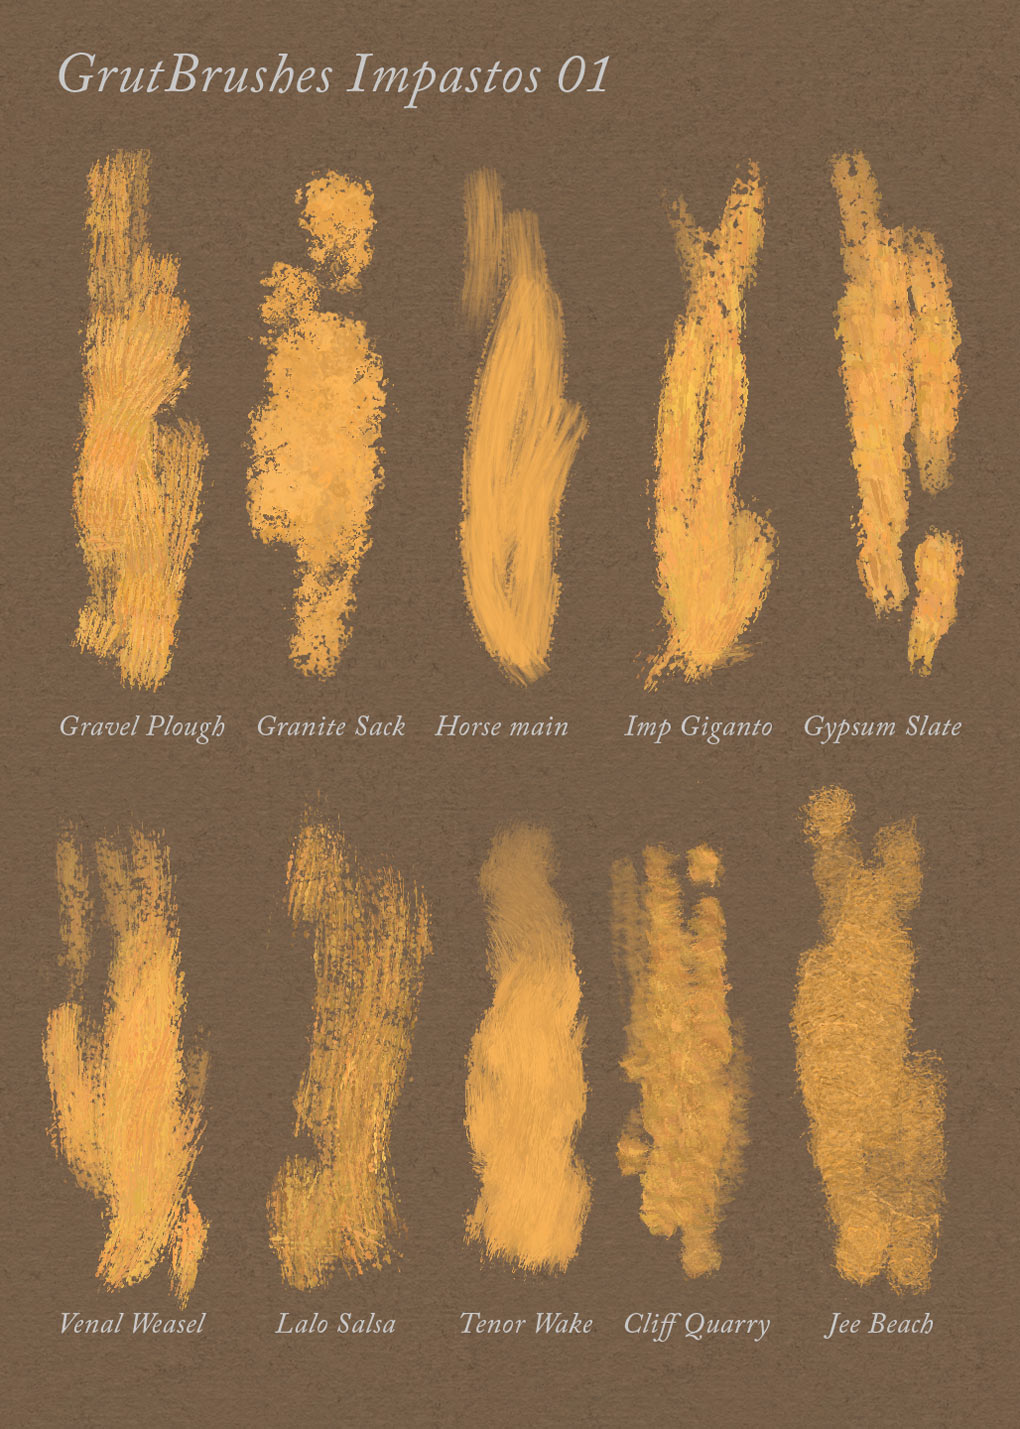
For this reason I recommend installing my native Procreate brushes instead of the Art Brushes Complete Photoshop brushes set, but I understand that since I have about 5 times as many Photoshop brushes than Procreate brushes, people will still want to import the Photoshop Art Brushes into Procreate so I made this step by step video tutorial to show you how to do it on your iPad:

Video Tutorial: Converting GrutBrushes ABR Photoshop Brushes into Procreate

flags to show that video is available in French, Spanish, German, Korean, Italian and Japanese

Note: The Photoshop to Procreate video tutorial above is available in many languages (German, Spanish, French, Korean, Japanese, Italian, etc) just click on the globe in the bottom right to choose your language and/or subtitles where available. Feel free to email me to request additional languages!

“Procreate can convert any Photoshop ABR. All the brushes I converted imported perfectly”

I hear this a lot and it’s tempting to think that Procreate can convert absolutely every Photoshop brush you throw at it because it does such a good job, but unless you have used that brush in Photoshop, it’s almost impossible to know if a brush has converted properly.

Facebooktwitterredditpinterestlinkedinmail
Posted on Leave a comment

How to Install New brushes into Photoshop automatically using the plugin (Video Tutorial)

One click installation of Photoshop brushes into Photoshop

Buying the Artbrushes Photoshop brushes Set gives you a free two month  membership, which includes all new brushes published in the Shop for 60 days, if you are a Photoshop CC user and are using the GrutBrushes plugin you can install the newest brushes without even leaving Photoshop. This 30 second tutorial shows how it’s done.

Tips:

  • The Photoshop brushes are always listed in order of publication, with the newest one shown first.
  • If you can’t remember if you installed the newest Photoshop brush, Click install and the plugin will let you know if you have it already.
  • The web panel is slow to load, you may think nothing is happening but it should load within about 15 seconds (im trying to change this)
  • The red play button will pop up a video preview of the brush in action.

Facebooktwitterredditpinterestlinkedinmail

Posted on Leave a comment

Getting The Most out of Your Photoshop Brushes – Exploring The Low Pressure Range

http://grutbrushes.wistia.com/medias/lpubpnx945?embedType=async&videoFoam=true&videoWidth=1020

Sometimes people ask me which brush I used to do the shading in this painting and when I tell them it’s the ‘Ocean Liner‘ brush they usually don’t believe me and I really don’t blame them because this is the stroke most people get when they use the ocean liner brush:

Brush stroke with average pressure applied
Photoshop Brush stroke with average pressure applied

The fact is that most Photoshop brushes have a wide range of looks that you can get simply by varying the pressure of your stylus and sometimes you can find some of the most interesting effects at the very low end of the pressure scale.

By charging the brush size slightly from 20 to 45 pixels and stroking ever so lightly, and lifting my stylus between strokes (this part is important!) I can begin to build up this nice texture.

[baslider name=”lowstyluspressure”]

Now I probably wouldn’t set out to create this with this brush but the point is to not accept your brushes at face value. Experiment and investigate how they behave at the very lowest stylus pressure ranges and you may discover that they, like you, have hidden talents.


 Facebooktwitterredditpinterestlinkedinmail

Posted on 2 Comments

Impasto Painting in Photoshop – Quick Tips 01

Here are a few quick tips to get you going with the Photoshop Impasto brushes

I will be doing a series of tutorials on how to use the GrutBrushes Photoshop Impasto brushes but this short video above shows a few brief tips.

To summarise:
– Vary your stylus pressure and use short strokes for a more organic look
– Use a flatter Photoshop brush to block in large areas
– Press softly on your stylus to blend or soften texture
– Push harder when you want more texture
– Use alt/option to pick colours from your painting

Brush Strokes and animated previews

Photoshop Impasto painting with GrutBrushes


Impasto Brushes from Impastos 01

(Mouseover or tap the icons below to watch the Photoshop brushes drawing ‘live’!)


'Gravel Plough' Photoshop Impasto brush
‘Gravel Plough’ Photoshop Impasto brush


'Granite Sack' Photoshop Impasto brush

‘Granite Sack’ Photoshop Impasto brush


'Horse Main' Photoshop Impasto paint

‘Horse Main’ Photoshop Impasto brush


'Imp Giganto' Photoshop Impasto paint

‘Imp Giganto’ Photoshop Impasto brush


'Gypsum Slate' Photoshop Impasto brush

‘Gypsum Slate’ Photoshop Impasto brush


'Venal Weasel' Photoshop Impasto oil paint

‘Venal Weasel’ Photoshop Impasto oil brush


'Venal Weasel' Photoshop Impasto oil paint

‘Venal Weasel’ Photoshop Impasto oil brush


'Cliff Quarry' Photoshop Impasto oil paint

‘Cliff Quarry’ Photoshop Impasto oil brush


'Tenor Wake' Photoshop Impasto oil paint

”Tenor Wake’ Photoshop Impasto oil brush


'Jee Beach' Photoshop Impasto oil paint

‘Jee Beach’ Photoshop Impasto oil brush


Facebooktwitterredditpinterestlinkedinmail

Posted on 6 Comments

Q&A #01 – How to Make an Eraser out of a Photoshop Brush

How to make an eraser out of a brush in Photoshop

Q: George asked me in an email: “Is there any way to use these brushes as an eraser?”

A: Yes! If you’re painting or drawing in Photoshop using a brush that has a nice organic brush stroke and you want to correct or erase part of your painting using an eraser that has the same look and feel of your brush instead of the default Photoshop erasers there are a number of ways to do so in Photoshop.

Perhaps the easiest is to switch your brush mode from ‘normal’ to ‘clear’ which will essentially turn your current brush into an eraser, with all it’s settings in tact. But what if you have switched brushes or recently changed the settings of your brushes and want to go back to a previous brush? There’s an easy way to do that as well. With your eraser tool selected, just open the brush preset panel and you will see the history of the last seven brushes you used in order. Simply select the one you want to use and your eraser now takes on almost all the properties of that brush.

See how it’s done in this 45 second video:


Facebooktwitterredditpinterestlinkedinmail