Did you know that you can convert any Photoshop brush to a mixer/blender brush by holding down ctrl+alt on Windows or Cmd+Option and clicking on it? I show you how in less than 30 seconds in this Photoshop video tutorial.
Keep in mind that not all brushes will make ideal mixer brushes and you will almost certainly want to tweak it once you make it.
A customer told me that she always works in 600 dpi and wanted to put her artwork into an Art Surface and make sure it remained at 600 dpi so I made this video for her, showing two different ways to do it. There’s a text summary below the video
Method 1
Change the dpi to 600 dpi with resampling off (unchecked) Then paste your 600 dpi image into it (into the green ‘Artwork’ layer)
Then you can use the crop tool to increase your canvas size to any size you need and the background will magically fill in the paper texture seamlessly. Continue reading How to Scale a Photoshop Art Surface Paper texture to 600dpi
If you find your brush lags as you draw with your stylus, there are (unfortunately) many possible reasons but here are some things to try
The very first thing to do is to turn off smoothing on your brush, if it’s on. This can make it appear as if your brush is lagging but that is just the effect of the smoothing function, slowing your line down to even it out any jitters you may have as you draw. High smoothing will slow down your strokes considerably
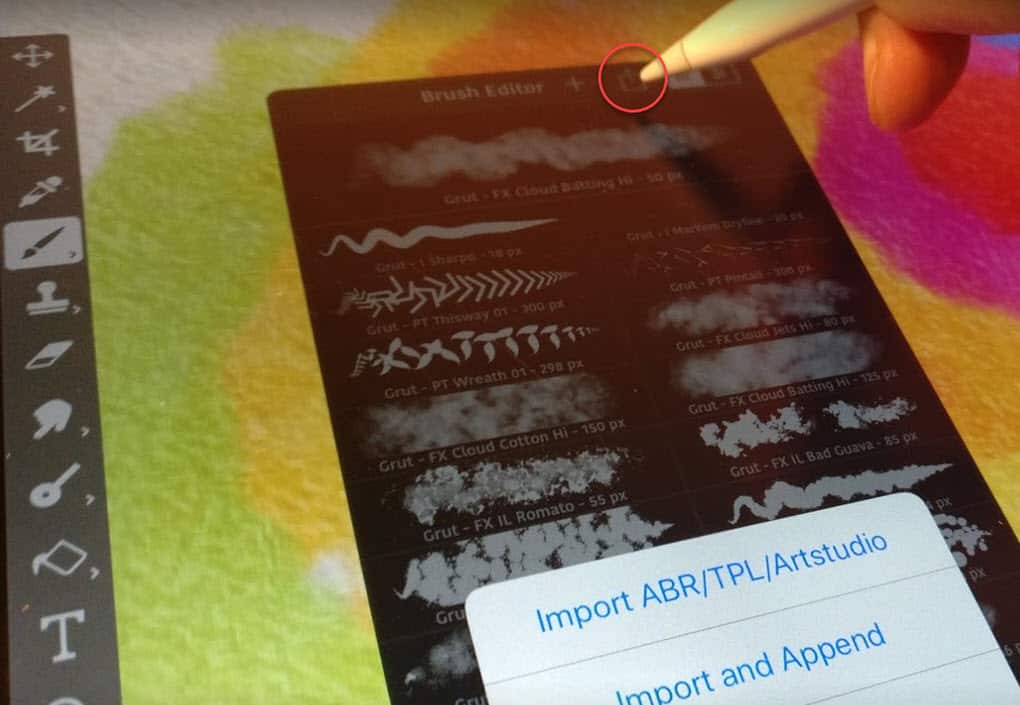
I get this question almost every day now and while I don’t have any proper documentation for it yet, you can import GrutBrushes TPL files into both Artstudio Pro (I love this app!) and Adobe Sketch apps
You can import any of the GrutBrushes TPLs right now, but you probably don’t want to import them one at a time. So, in this super-quick video tutorial I show you how to export a batch of TPL brushes into one file all at once. That way you can just upload that single TPL containing all your favourite GrutBrushes to DropBox, iCloud or whatever you use to get files onto your iPad.
Once you have it in the cloud you can import it into Adobe Sketch or Artstudio Pro (shown below) Someday I hope to make a video tutorial showing the whole process, but until then, both apps do currently have information in their documentation on how to import Photoshop brushes so have a look around.
Importing Photoshop Brushes (TPL) into the Artstudip Pro app on the iPad Pro
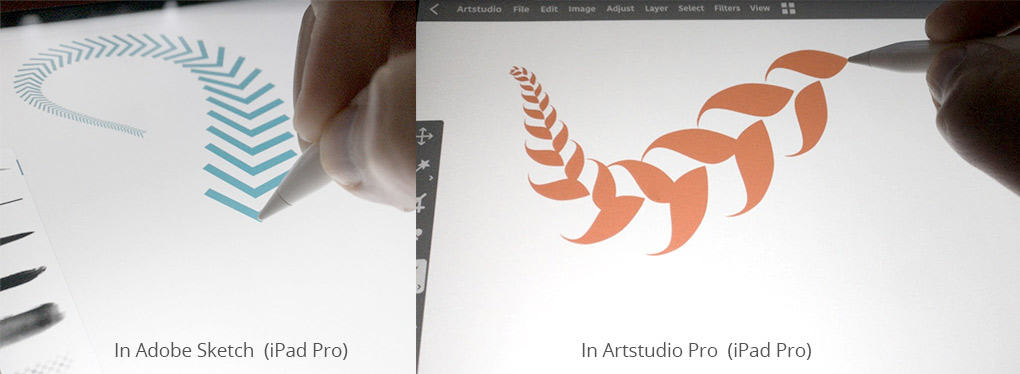
Here I am using the GrutBrushes pattern brushes on the iPad pro! Using GrutBrushes with the Apple Pencil is a dream.
GrutBrushes can be imported into ArtStudio Pro and Adobe Sketch on th iPad Pros
…and no, sorry, you can’t use these GrutBrushes in Procreate! It has it’s own wonderful brush format but it can’t import Photoshop brushes. UPDATE: Procreate GrutBrushes are now available! They are not the same as the Photoshop brushes but I think you’ll like them just as much
There are dozens of apps that claim to be able to import Photoshop brushes but what most of them mean is that they can import the tip shape, but that’s just the most visible but probably the least important feature of a good digital brush.
GrutBrushes are all about the dynamics…HOW the brush behaves, not what it’s brush tip shape looks like.
Unless an app imports all the brush dynamics it’s really not importing the brush.
Adobe Sketch and Artstudio Pro are currently the only apps that can import GrutBrushes Photoshop brushes. If any new apps come along that claim to be able to import Photoshop brushes and all the brush dynamics please let me know, I’ll be the first to buy it and test it out.
1. Open Tablet Properties
2. Change one of the buttons to ‘erase’
Now when you are in brush mode and you hold down that button on your stylus, your brush will temporarily turn into an eraser! Just release it to return to brush mode and keep painting.
The temporary eraser will have the same settings as the last eraser you used
BONUS TIP: To do this without changing your preferences, just press and HOLD the “e” key to erase temporarily. Keep holding the “e” key until you are done erasing, then when you lift your stylus and then release the “e” key your tool will switch back to the brush tool!
I know you can flip the stylus over and erase, but why interrupt your flow when you can just press on a button?
BONUS TIP 2: Digital artist SyntheticGeek added this great tip for Wacom tablet users:
“I add Keystroke Modifiers to my Wacom Stylus buttons so I can more quickly use ANY brush preset as an eraser. One button to change it to a “Clear” GrutBrush and one to change it back. “Alt + Shift + R” will change it to a Clear (erasing) GrutBrush and “Alt + Shift + M” will take it back to “Multiply”.
NOTE; Not all GrutBrushes’ painting opacities are set to Multiply as their default, some are set to Normal, which would be “Alt + Shift + N”. (for Mac users Alt = “Option”). You can always just tap the brush preset again in the GrutBrushes Tool Panel. That way, you don’t have to wonder if its default was Normal, Multiply or Whatever. “
How to make a custom button that turns your Photoshop brush into an eraser
You could adapt it to any tablet or hardware that allows custom keyboard commands to be programmed to a button
UPDATE 2020: Simplest method of all…while painting, hold down the TILDE key: `(usually at the top left of your keyboard while you are painting and your brush will turn into an eraser, with all the same properties, as long as you hold it down)
If, like me, you loved being able to select any tool (usually the eraser) and then pick from your most recent brushes to convert a paint brush to an eraser, or a mixer brush, or a smudge tool with all dynamic setting intact you can’t do this anymore with the latest Photoshop update (v 19) You can still use the clear mode trick to convert your brush to an eraser which I go over in the aboce video inclusing the keyboard shortcuts.
The keyboard shortcut I use in the video are
Normal Mode:
WIN: Shift+Alt+N
MAC: Shift+Alt+N)
Sometimes people ask me which brush I used to do the shading in this painting and when I tell them it’s the ‘Ocean Liner‘ brush they usually don’t believe me and I really don’t blame them because this is the stroke most people get when they use the ocean liner brush:
Photoshop Brush stroke with average pressure applied
The fact is that most Photoshop brushes have a wide range of looks that you can get simply by varying the pressure of your stylus and sometimes you can find some of the most interesting effects at the very low end of the pressure scale.
By charging the brush size slightly from 20 to 45 pixels and stroking ever so lightly, and lifting my stylus between strokes (this part is important!) I can begin to build up this nice texture.
[baslider name=”lowstyluspressure”]
Now I probably wouldn’t set out to create this with this brush but the point is to not accept your brushes at face value. Experiment and investigate how they behave at the very lowest stylus pressure ranges and you may discover that they, like you, have hidden talents.
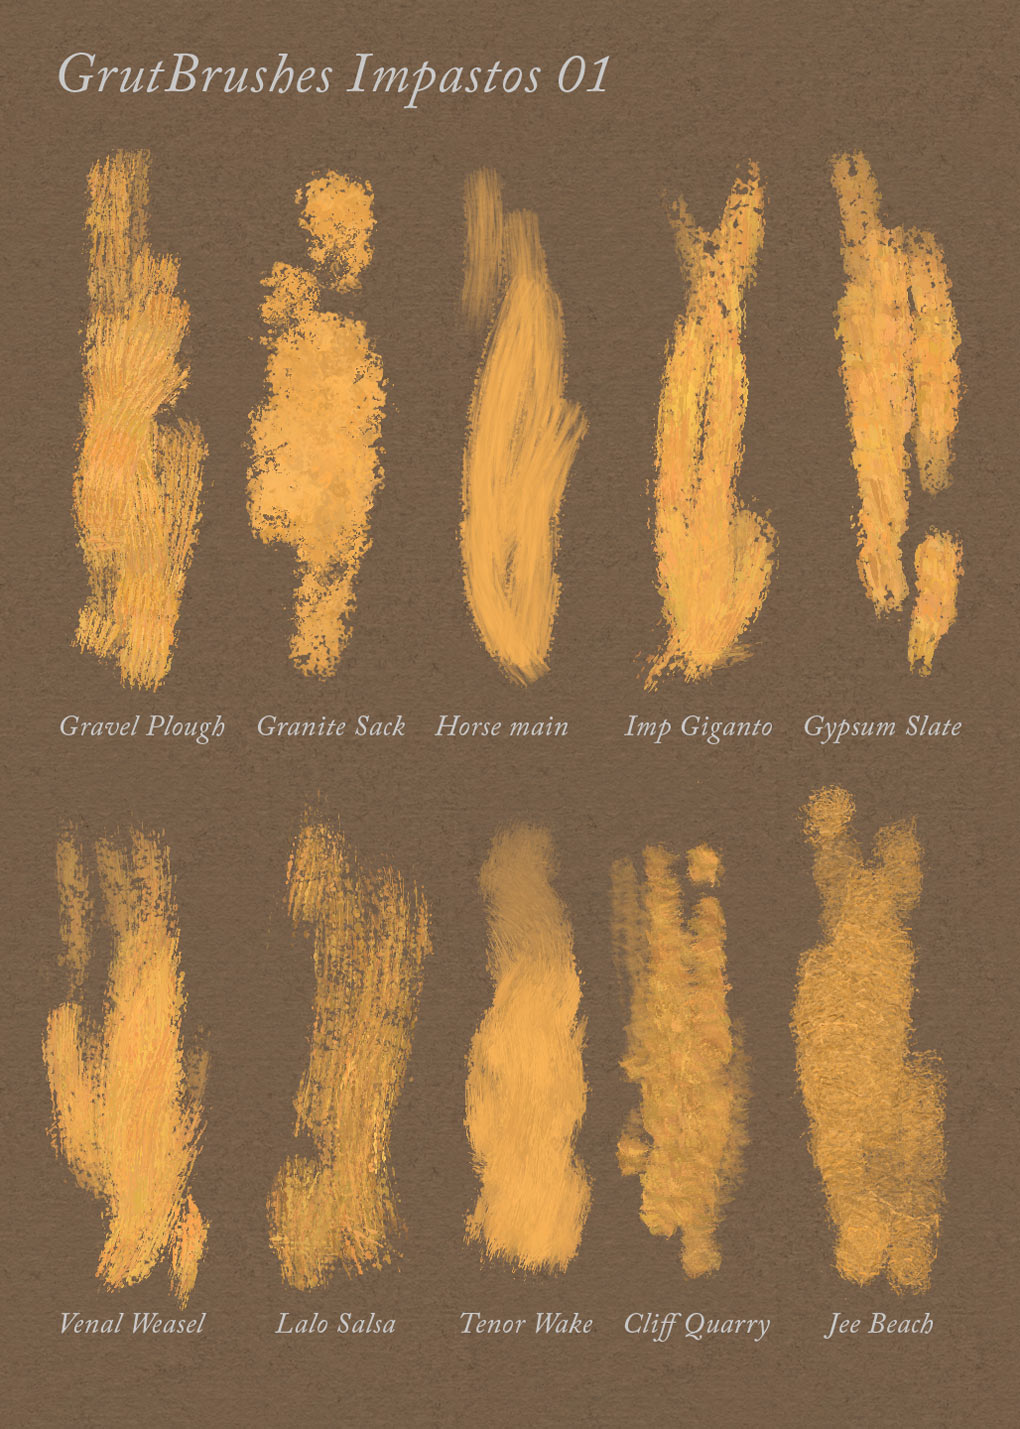
I will be doing a series of tutorials on how to use the GrutBrushes Photoshop Impasto brushes but this short video above shows a few brief tips.
To summarise:
– Vary your stylus pressure and use short strokes for a more organic look
– Use a flatter Photoshop brush to block in large areas
– Press softly on your stylus to blend or soften texture
– Push harder when you want more texture
– Use alt/option to pick colours from your painting
One of the great things about digital painting is that your canvas can be your palette. By holding down the ALT or Option key in Photoshop you can pick a new color from your current painting’s canvas and continue on. Here you can see me travel a tremendous distance from light to dark just by picking a new darker color from the crevices of my previous impasto brush strokes in Photoshop. This was painted using the new Linsee Dew Photoshop Impasto Oil brush